>U Mom Knows Best: gluten free recipe
Showing posts with label gluten free recipe. Show all posts

Gluten-Free Gingerbread Cookies That Are Dairy-Free

 This holiday season home bakers can create traditional holiday treats that everyone can enjoy. These delicious gingerbread cookies are both gluten-free and dairy-free. They are the perfect holiday cookie for those with food allergies.

I received a sample of Mightylicious to facilitate this post

 If you avoid wheat and dairy, you know the struggle of finding something to enjoy at a holiday party. There are never any gluten-free baked goods on the dessert table. So you always have to say no to enjoying Christmas cookies or you have to bring your own dessert that is gluten-free.

Then there is the struggle of baking holiday treats that are both gluten-free and dairy-free. It can be hard to find a gluten-free flour that makes the best cookies as most gluten-free flours just don't work for making cookie dough. 

Meet Mightylicious 

Mightylicious has a simply delicious answer – three, new high-quality flour blends for baking up mouthwatering treats that look, taste, and act like the real thing. Their flour blends are perfect for all your holiday baking. Mightlylicious has three gluten-free flour blends ~ All Purpose GF flour blend, Vegan GF Flour Blend, and Vegan Chocolate Brownie GF flour Mix.

You may know Mightlylicious for their delicious gluten-free cookies. Their scrumptious handcrafted Mightylicious Gluten Free cookies, named Top Pick in Food & Beverage Magazine, have rocked the gluten-free world with their amazing flavor and perfect crumble-free texture.

These gluten-free flour blends are perfect for making all of your favorite holiday treats like these gingerbread cookies. You can even make vegan Christmas cookies with Mightylicious's Vegan Gluten-free Flour Blend.

All three flour blends are certified gluten-free, kosher, non-GMO verified, and the vegan blends are free from key allergens.


Gluten-Free Gingerbread Cookies Are

~ Gluten-Free

~  Dairy-Free

~ Delicious 

~ Perfect For Parties

~ Perfect for Cookie Exchanges

~ Soy-Free

~ Celiac-Safe

~ Perfect For Making Gingerbread Men

~ Perfect For Making Gingerbread Houses

Gingerbread is a holiday classic! This gluten-free recipe is perfect for making gingerbread people and gingerbread houses. The cookie dough is perfect for rolling out for using cookie cutters. While these gingerbread cookies taste amazing without frosting, you can frost the cookies after baking them.

 Ingredients Needed

~ Mightylicious Vegan GF Flour Blend

~ Spices - cinnamon, ginger, cloves, nutmeg

~ Baking Soda

~ Salt

~ Vegan Butter

~ Egg

~ Brown Sugar

~ Molasses

~ Vanilla Extract

Check out these gluten-free & dairy-free recipes 

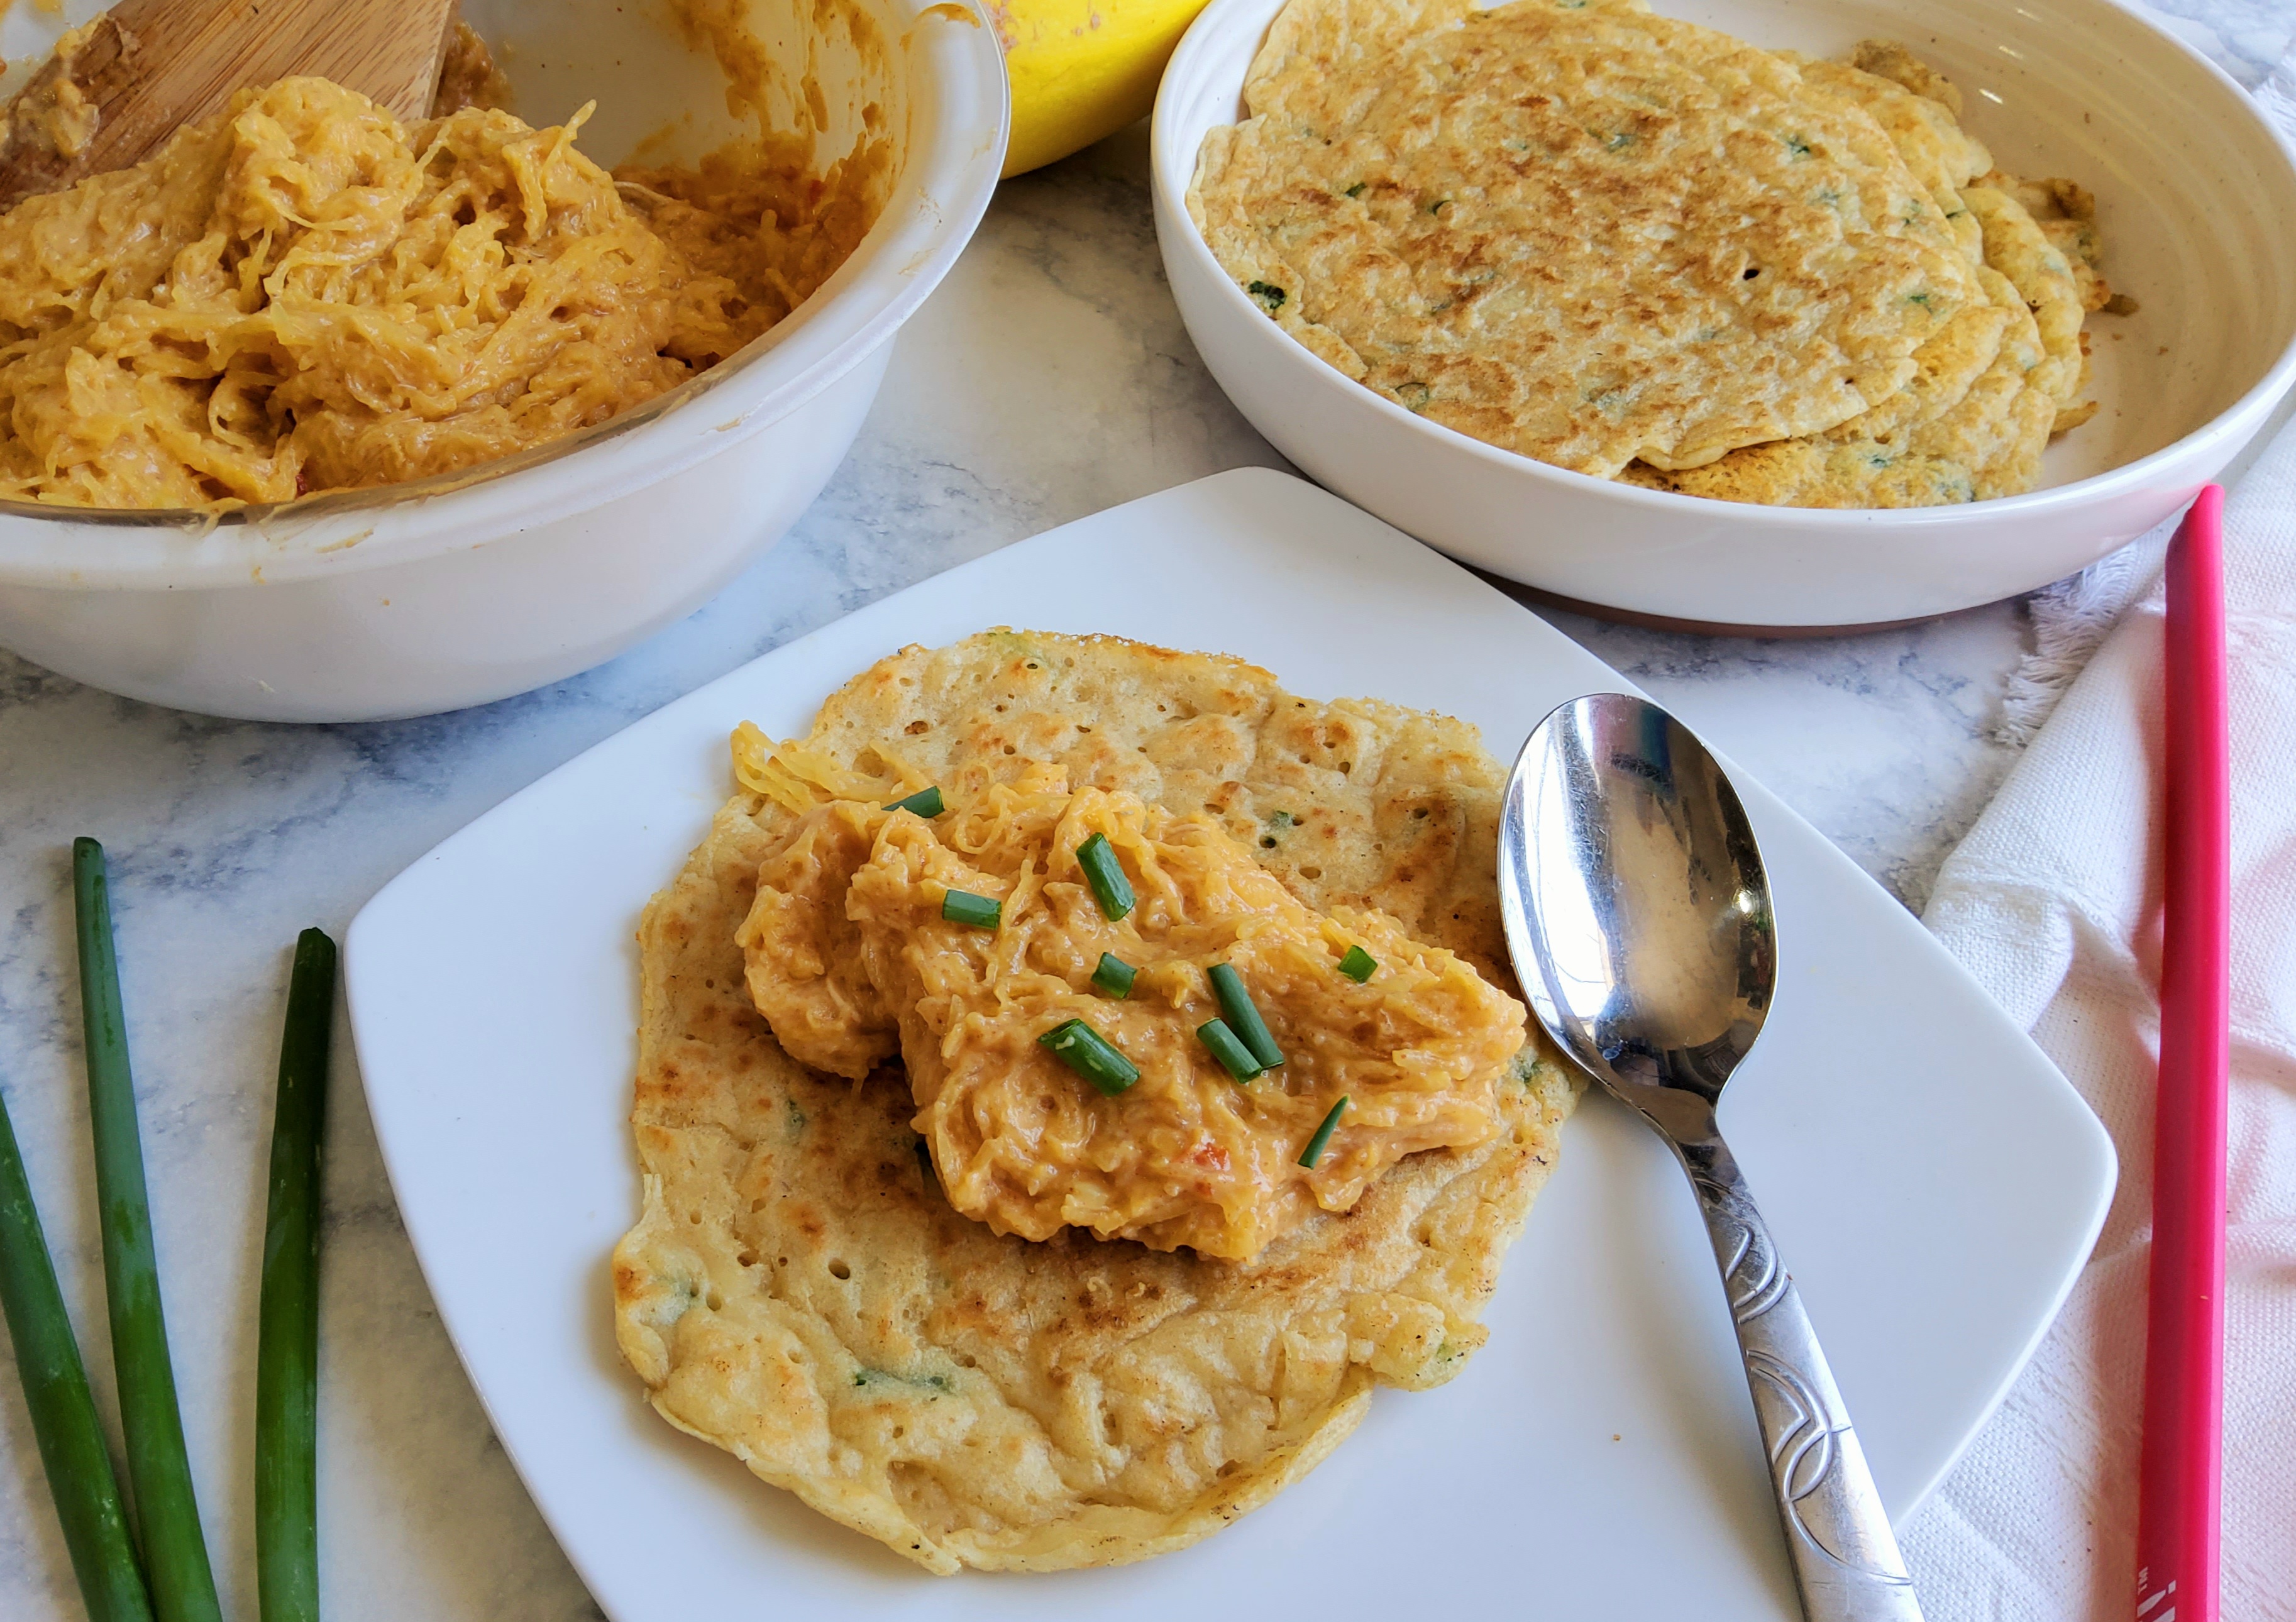
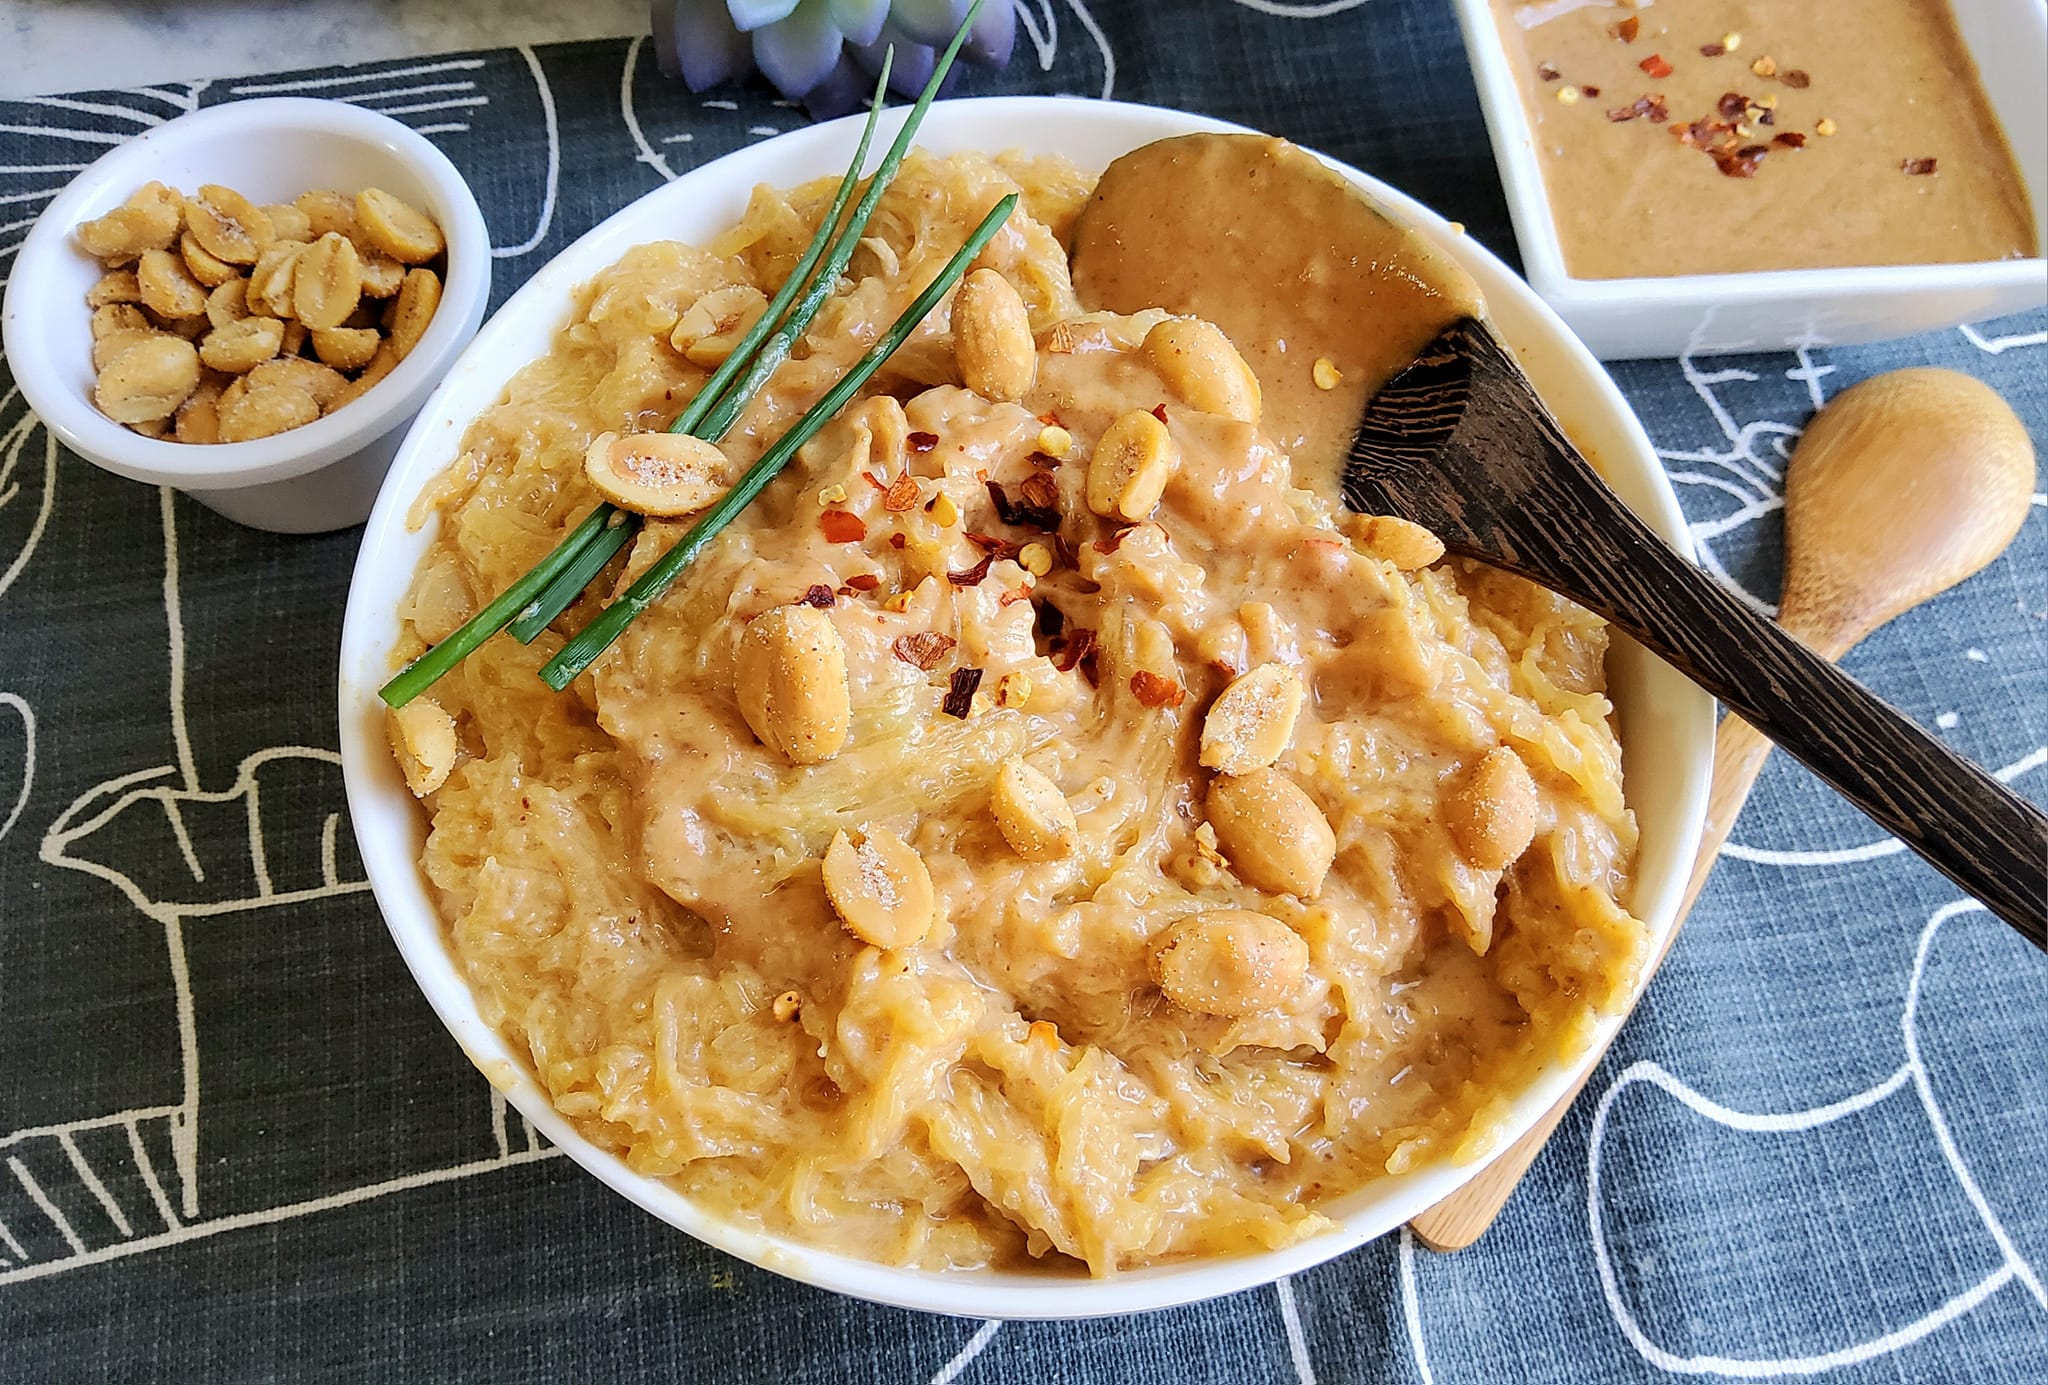
Gluten-Free Green Onion Pancakes With Thai Peanut Spaghetti Squash

Gluten-Free & Vegan White Chocolate Peanut Butter Cookies

1-Ingredient Gluten Free Buckwheat Bread

Gluten-Free Bagels Made With Oat Flour

3 Ingredient Vegan Gluten Free Protein Crepes

Gluten Free Chocolate Cream Mint Pie


Gluten Free Green Onion Pancakes With Thai Peanut Spaghetti Squash

Gluten-free green onion pancakes offer a delightful twist on a classic Oriental dish, making it great for those who avoid wheat. Fill these gluten-free pancakes with a delicious Thai peanut spaghetti squash and you will have a delicious treat.


These gluten-free green onion pancakes are a wheat-free version of Chinese Scallion Pancakes and are delicious by themselves. I decided to fill them with a mixture of cooked spaghetti squash that is perfectly blended with a savory Thai peanut butter sauce and the result is amazing!

 A couple of weeks ago, I was blessed with an insane amount of spaghetti squash, the leftovers from my church food pantry. So I have been creating many different recipes for spaghetti squash. Spaghetti squash is a delicious low-carb substitute for pasta and many people like to serve it with tomato sauce. This gluten-free squash also tastes amazing with peanut butter. So I made a batch of peanut butter spaghetti squash.

Inspired by a recipe on a vegan gluten-free flour package

While looking at the back of a package of Mightylicious Vegan All-Purpose Gluten-Free Flour, I noticed a recipe for the best gluten-free pancakes and I had to make them. While the gluten-free pancake recipe was a simple pancake recipe, I decided to make it into a savory pancake and added some fresh green onion from my garden. They were delicious! 

These green onion gluten-free pancakes reminded me of Chinese scallion pancakes and I decided to fill them with my peanut butter spaghetti squash. The result was so good and I just had to share this recipe with others who are looking for allergy-friendly recipes that use spaghetti squash.


Gluten-Free Green Onion Pancakes With Thai Peanut Spaghetti Squash is

~ Gluten-Free

~ Dairy-Free

~ Wheat-Free

~ Vegan

~ Delicious

~ Healthy

~ Allergy-Friendly, except for peanuts

Check out this Dairy-Free Vegan Chocolate Protein Pancakes Recipe

A wonderful vegan gluten-free flour blend from Mightylicious

 You may know the name Mightylicious from their delicious gluten-free cookies. This gluten-free cookie brand decided to sell its gluten-free flour blend so folks can use it in their favorite gluten-free recipes, like pancakes. You will like that this wheat-free flour is also vegan and soy-free.

Three recipes equal one delicious recipe

This is a three-in-one recipe, so I will include the ingredients that are needed for each recipe. That will make it easy to shop for the gluten-free ingredients. 


Ingredients Needed

 1. Gluten-Free Green Onion Pancakes

    ~ Mightylicious Gluten-Free Flour

   ~ Coconut Oil

    ~ Baking Powder

   ~ Green Onion

   ~ Salt

 2. Thai Peanut Sauce ~ Get the recipe

   ~ Creamy Peanut Butter

   ~ Gluten-Free Soy Sauce

   ~ Rice Vinegar

   ~ Maple Syrup

   ~ Garlic

   ~ Crushed Red Pepper

3. Spaghetti Squash ~ Get the recipe

   ~ Spaghetti Squash


Steps to make Gluten-Free Green Onion Pancakes With Thai Peanut Spaghetti Squash

~ Cook the spaghetti squash in the pressure cooker

~ Make the Thai Peanut Sauce

~ Mix the peanut sauce into the spaghetti squash

~ Make the Gluten Free Green Onion Pancakes

~ Create the savory pancake recipe


Tips For Storing Leftovers

+ Since you will be using only a couple of spoonfuls of the Thai Peanut Spaghetti Squash per pancake, there will be leftovers of the spaghetti squash. Store the leftover spaghetti squash in the fridge for up to a week. 

+ The gluten-free green onion pancake recipe makes four pancakes and they will keep in the fridge for several days. If you need more pancakes, this recipe can be doubled. 

+ Gluten Free Green Onion Pancakes With Thai Peanut Spaghetti Squash can also last several days in the fridge. 

+ I don't recommend freezing any of the leftovers.

Grab the recipes 

Spaghetti Squash in the Pressure Cooker

Thai Peanut Sauce

Pin this recipe on Pinterest to save for later


Creamy Thai Peanut Butter Sauce For Noodles

 This is the best creamy Thai Peanut Sauce! Perfect for noodles, salads, or as a dipping sauce! You will love the flavor profile of sweet, and salty with a bit of spice. It is a no-cook sauce and can be made in less than 5 minutes.


Are you looking for a delicious sauce that is made with peanut butter? Look no further, as I have the perfect peanut butter based sauce that can be used as a dipping sauce or as an ingredient in many delicious recipes like Thai peanut noodles.

 This peanut sauce is so easy to make and requires no cooking. A few simple ingredients are all you need to make this versatile peanut sauce. The best part is it only takes 5 minutes to make. 

Thai peanut sauce can be used in so many ways

This creamy Thai peanut sauce can be enjoyed in so many ways. I like to blend this sauce into cooked rice noodles or blend it into pressured cooker spaghetti squash. This flavorful sauce also makes a perfect dipping sauce for spring rolls or as a dressing on a salad. For a quick and easy dinner idea, stir this peanut butter sauce over some ramen noodles. 

My favorite way to use this great peanut sauce is with a batch of homemade gluten-free green onion pancakes and spaghetti squash noodles. This is a delightful recipe that I created when life gave me an abundance of spaghetti squash. Grab the recipe here


Thai Peanut Butter Sauce is

+ Creamy

+ No-Cook Recipe

+ Sweet

+ Salty

+ Gluten-Free

+ Plant-Based

+ Perfect Over Noodles

+ Best Dipping Sauce

+ Easy To Make


A sauce with intense flavor

 The Thai peanut sauce has an intense flavor that is sweet, salty, and spicy. This is a lick-the-spoon-clean recipe. It is an umami-packed sauce that you will want to pour over everything!

Ingredients Needed To Make Thai Peanut Sauce

+ Peanut Butter

+ Gluten-free Soy Sauce

+ Rice Vinegar

+ Maple Syrup

+ Garlic

+ Crushed Red Pepper

How to Make Thai Peanut Sauce

 Making the sauce is super simple and quick. Just grab all the ingredients and put them in a jar or bowl. Then stir the ingredients together for a couple of minutes. At first, the sauce will be lumpy but keep stirring and it will become smooth and creamy. 

Tips for making the peanut sauce

+ Leftovers keep in the fridge for a week

+ Works best with creamy peanut butter

+ Recipe can be doubled

+ Add more crushed red pepper for a spicer sauce

+ Add peanuts for a chunky sauce


Recipes needed for the homemade gluten-free green onion pancakes with peanut butter spaghetti squash noodles

Gluten-Free Green Onion Pancakes

Pressure Cooker Spaghetti Squash

Gluten-free green onion pancakes with peanut butter spaghetti squash noodles

Pin This Recipe on Pinterest To Save For Later


Dairy-Free Chocolate Peanut Butter Protein Ice Cream With Ninja Creami

 Looking for dairy-free ice cream recipes to make in the Ninja Creami machine? I got you covered with a delicious creamy chocolate peanut butter protein ice cream recipe. You will love that it has 10 grams of vegan protein per serving. This ice cream is also gluten-free and soy-free recipe.

This post contains affiliate links.

 Buying allergy-friendly ice cream at the store has been quite the challenge when you are allergic to dairy, wheat, and soy protein. Reading dairy-free ice cream labels has been frustrating. It has been nearly impossible to find a vegan ice cream that contains no wheat or soy. I got excited when Ben and Jerry came out with a gluten-free, dairy-free ice cream. Then I read the label and discovered that the ice cream contains soy protein. 

 The exciting flavors of dairy-free ice cream of most store varieties contain wheat ingredients. So that usually leaves my vegan ice cream selection choices to vanilla, chocolate, and cherry garcia. 

 I got tired of paying the high prices of plant-based ice cream and the limited selection that I could eat. So I treated myself to a Ninja Creami ice cream maker. I am excited to be able to create delicious vegan ice cream. No longer will my ice cream choices be limited to three flavors. With the Ninja Creami, I will be able to make customized ice cream that is safe for me to eat.

My first Ninja Creami dairy-free creation is loaded with protein

​​One of my favorite things about the Ninja Creami ice cream machine is the ability to easily customize ingredients. I also love that it saves me money, as dairy-free ice cream is expensive!

 This means you can easily create different flavors of frozen treats according to your needs, whether you’re following a low-carb or keto diet, eliminating gluten, cutting back on sugar, or need dairy-free ice creams. 

This homemade ice cream machine can also help you make healthy frozen treats. So I decided to make a dairy-free protein ice cream for my first creation. If I was going to enjoy a sweet treat, I might as well make it healthy with some plant-based protein. 

Nuzest Clean Lean Plant-Based Protein For the Best Vegan Protein Ice Cream Recipe

 Nuzest protein powder is great for adding protein to recipes. Nuzest is the only protein powder that I have discovered works best in recipes. Nuzest mixes completely into recipes and does not leave a grainy texture or a chemical taste. In fact, Nuzest can also replace flour in recipes for awesome gluten-free baking.


 I love using Nuzest protein in my gluten-free mocha brownies. Nuzest Protein is dairy-free, soy-free, nut-free, and gluten-free. Nuzest also contains 20 grams of plant-based protein per serving. 

Save 15% on Nuzest with code MOMKNOWSBEST15

Dairy-Free Chocolate Peanut Butter Protein Ice Cream

~ IS CREAMY ~ Using the right ingredients makes a difference

~ IS HIGH-PROTEIN ~ Nuzest protein adds 10 grams of plant protein per serving

~ IS DAIRY-FREE ~ This is great for those with dairy allergies

~ IS GLUTEN-FREE ~ This is great for those who avoid wheat

~ IS HEALTHIER ~ I used less sugar and healthy fats

~ IS EASY TO MAKE ~ The Creami is easy to use

 After I took my Ninja Creami maker out of the box, I read the included recipe book. The Ninja Creami Recipe book had suggestions for ingredient swaps to make dairy-free ice cream. Then I went to the internet to get more ideas for dairy-free ice cream recipes. It was then that I saw that people were making protein ice cream. 

So I knew that I had to add Nuzest Protein to my dairy-free ice cream recipe as extra protein is always a good thing when you follow a plant-based diet. 


Ingredients Needed For Dairy-Free Chocolate Peanut Butter Protein Ice Cream

~ Coconut Milk ~ The extra fat is needed for a creamy texture

~ Nuzest Chocolate Protein ~ This is the best way to add protein 

~ Agave Syrup or Maple Syrup ~ adds a touch of sweetness

~ Peanut Butter ~ adds flavor

~ Cocoa Powder ~ adds more chocolate flavor

~ Vanilla ~ enhances the flavor

 To make this delicious ice cream, you just need a handful of simple ingredients, a blender, and a Ninja Creami. You also need to have patience, as you have to freeze the ingredient mixture for 12-24 hours.

Can I use a regular ice cream maker?

 I have not made this recipe in a regular ice cream maker, so I don't know the results. From reading other articles, I have learned that the Ninja Creami works differently from a regular ice cream maker.


Ninja Creami Tips

~ Read the Creami Instruction book ~ if this is your first time making ice cream, read the instructions

~ Blend your ingredients before freezing 

~ Don't overfill the Creami Cups ~ stay 1/4 inch below the fill line as the ingredients will go up in volume in the freezer. You need the extra space when blending, as it adds volume to the mixture

~ Use the RE-SPIN Button ~ After you blend the mixture on the Ice Cream setting, it may look powdery or crumbly. The trick to getting creamy ice cream is to add a splash of plant-based milk and use the RE-SPIN function. If it is not creamy, re-spin again.

Save 15% on Nuzest with code MOMKNOWSBEST15

Storage and Refreezing Tips

If you have leftover ice cream, you can refreeze it. 

~ Just make sure to smooth out the ice cream before freezing, as this will help it re-blend better. 

~ Place the lid on the container and stick it back in the freezer.

~ When you want to enjoy the ice cream, add a splash of plant-based milk. Then place the container back in the Ninja Creami, and press the ice cream button.

Up Next ~ A delicious high-protein strawberry vegan ice cream recipe that uses real strawberries. 


Pin this recipe on Pinterest and follow Mom Knows Best 

~ For more delicious dairy-free ice cream recipes


Gluten-free Salted Chocolate Caramel Chia Seed Protein Pudding

Creamy and delicious is what this Gluten-free Salted Chocolate Caramel Chia Seed Protein Pudding is all about. Made with gluten-free and dairy-free ingredients; it's a healthy snack loaded with protein, fiber, and healthy fats!


 Looking for a guilt-free dessert that is a powerhouse of nutrition? Look no further as this Gluten-free Salted Chocolate Caramel Chia Seed Protein Pudding is loaded with nutrition. This dairy-free pudding is packed with protein, fiber, and plenty of chocolate goodness. The best part is how simple this gluten-free dessert is to make. Just combine a couple of healthy ingredients and you will have an amazing dessert that is good for you. This dessert is so healthy, that you can even enjoy it for breakfast. The hardest part of this creamy pudding is waiting for it to thicken up.

 So make sure to prepare this healthy recipe, the night before, so it is ready to enjoy the next day. Best tip ever ~ make several of these healthy pots of pudding, so you have plenty to share. These dairy-free desserts will keep for several days, so make plenty. That way you can grab a dairy-free protein pudding when your hunger sets it. These plant-based puddings contain 15 grams of plant-based protein, so they are perfect for after your workout or a quick out-the-door breakfast.

Sponsored post with Viva Naturals

 Salted Chocolate Caramel Chia Seed Protein Pudding is 

+ Creamy

+ Gluten-Free

+ Dairy-Free

+ Plant-Based

+ Vegan

+ Protein Packed

+ Full of Fiber

+ Rich in Healthy Fats

+ Soy-Free

+ Delicious

+ Easy to Make

 For those who follow a plant-based diet and avoid gluten, this Salted Chocolate Caramel Chia Seed Protein Pudding is perfect for you. Even if you don't follow a special diet, you need to try these cups of salted caramel chocolate treats as they are so delicious. I like to enjoy the dairy-free treats in the afternoon for a healthy snack. Of course, I also enjoy the pudding for breakfast and as a late-night snack. If your breakfast is the same day after day protein smoothie, then mix things up with this protein pudding topped with sliced strawberries.

Save 15% on Nuzest with code MOMKNOWSBEST15 


Ingredients needed for Chia Seed Protein Pudding

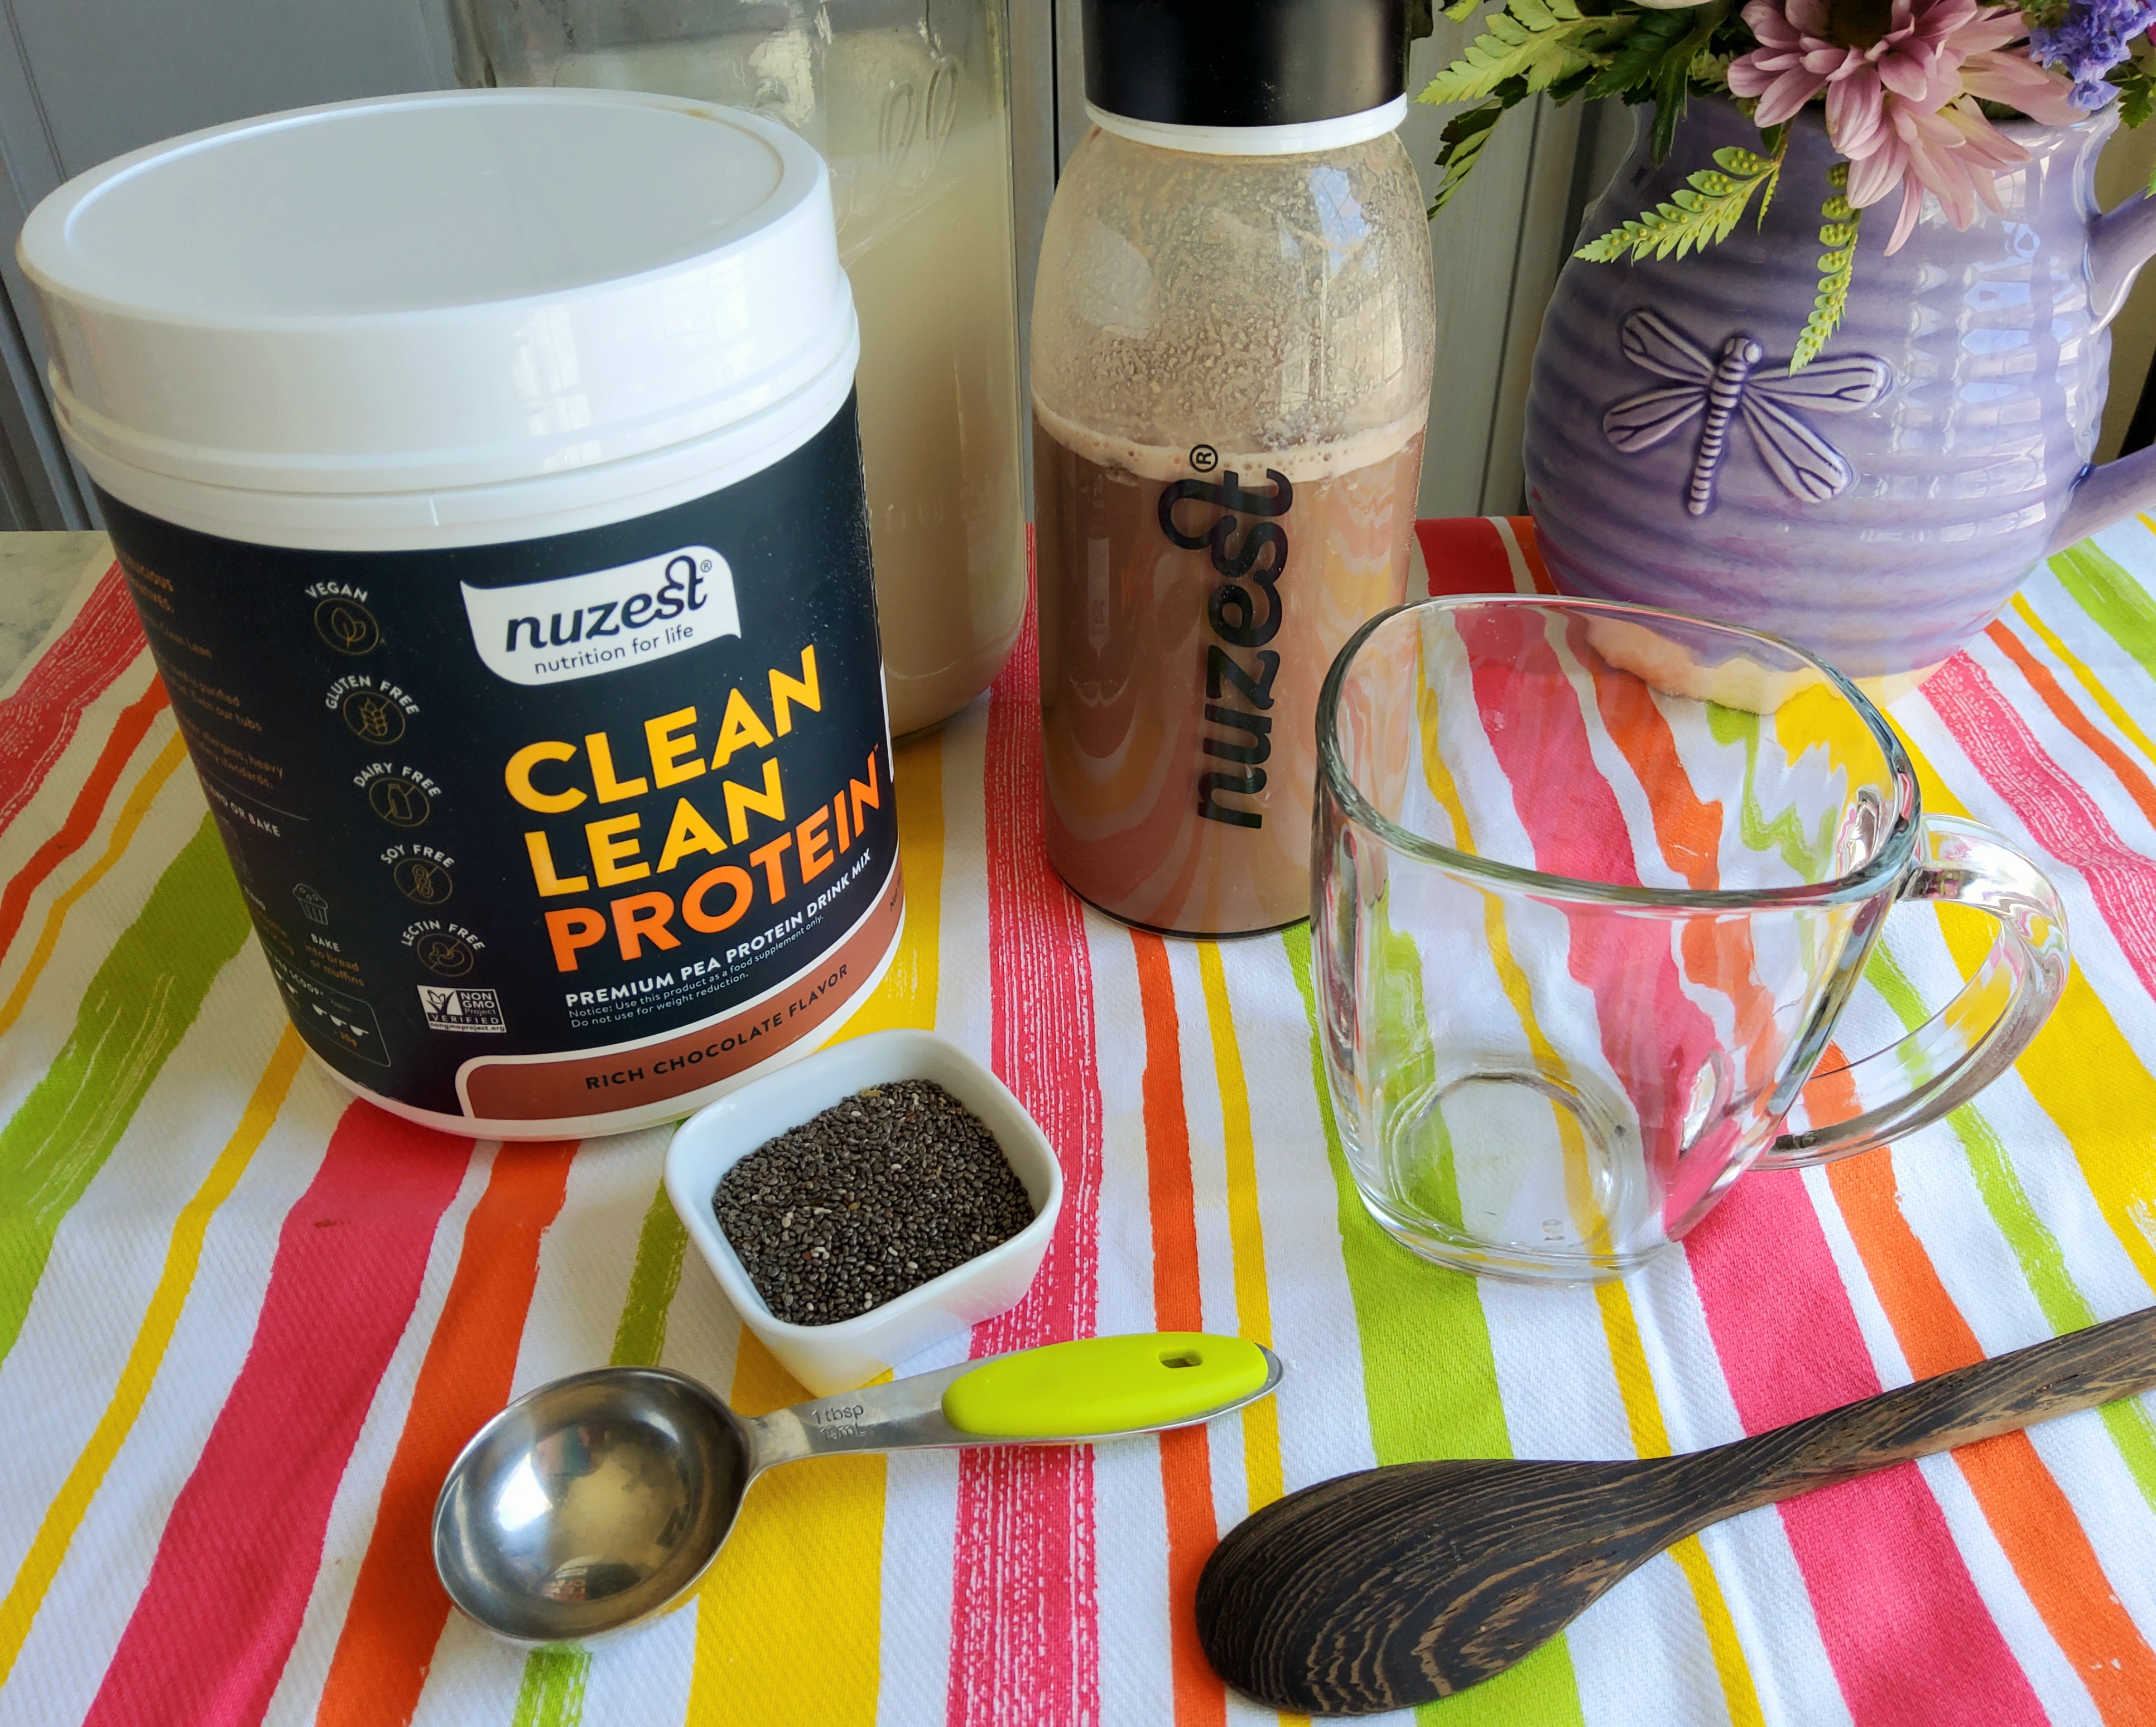
+ Plant-based protein powder ~ I like Nuzest Rich Chocolate. This plant-based protein is allergy-friendly, gluten-free, and made with clean ingredients. Nuzest is also low in carbs and sugar. Use my coupon code MOMKNOWSBEST15 to save 15%.

+ Plant-based milk ~ You choose your favorite plant-based milk. I like using this quick and easy homemade oat milk.

+ Chia Seeds ~ Make sure to grab organic certified gluten-free chia seeds. Save 10% OFF organic food with the code ORGANIC.

+ Vegan  Caramel & Sea Salt Chocolate Spread ~ My favorite vegan chocolate spread is a rich Belgian dark chocolate spread that is also gluten-free, nut-free, and low in sugar. Use my coupon code MOMKNOWSBEST to save 15% at https://www.lekkco.com/

+ Slice Strawberries ~ I prefer sliced strawberries with my Salted Chocolate Caramel Chia Seed Protein Pudding but you can omit this ingredient or use your favorite fruit.

Tiny Superfood Big Nutrition

 Viva Naturals Organic Chia Seeds have plant-based omega-3 and 6 fatty acids and are also high in fiber to support a healthy, balanced diet. Serve up big nutrition with these tiny seeds in your smoothies, oatmeal, yogurt, or salads! 


 I like adding chia seeds to my plant-based recipes and they are a staple in my plant-based pantry. These tiny seeds are loaded with nutrition and I add them to my daily smoothie for many reasons. Chia seeds add fiber and protein to my smoothies as well as healthy fats. I love how these superfood seeds swell up when added to liquids. Chia seeds can also be used as a plant-based egg replacement in many vegan recipes.

It is the chia seeds in this recipe that turns plan-based milk into pudding. I purchase my chia seeds from Viva Naturals as I know that I am getting the best organic gluten-free chia seeds. Sure chia seeds are gluten-free by nature but when I buy chia seeds from Viva Naturals, I don't have to worry about cross-contamination. 


 May is Celiac Awareness Month and Viva Naturals has a variety of Gluten-Free Products available on its website. From chia seeds to quinoa, you can feel safe when you purchase gluten-free organic foods at Viva Naturals. All of Viva Naturals' gluten-free products are certified gluten-free as well as organic, vegan, kosher, non-GMO, paleo, and keto. It is their promise to you, so you can feel safe when you purchase your pantry staples from Viva Naturals. Buying chia seeds from Viva Naturals is way better than buying from the bulk section at the grocery store, as who knows what could be lurking in that bin or scoop. Organic chia seeds are also very affordable.


How to make  Salted Chocolate Caramel Chia Seed Protein Pudding

 Making this chia seed pudding is so simple. Grab a small mason jar with a lid and pour in the plant milk of your choice. Then add a scoop of vegan protein powder to the non-dairy milk and place the lid on the jar. Shake it up well. You can also use a portable blender. Then add the chia seeds and place on the lid again. Shake well and place it in the fridge for several hours, preferably overnight. That way the chia seeds can swell up to thicken the milk.

 In the morning, grab a glass and the Lekkco chocolate spread along with some sliced strawberries. Soften the Salted caramel chocolate spread in the microwave for 10 seconds. Then have fun layering the chia pudding, chocolate spread, and strawberries. The Salted Chocolate Caramel Chia Seed Protein Pudding is ready to eat. 

Save 15% off with code MOMKNOWSBEST on all Lekkco vegan chocolate spreads 


Looking for another healthy breakfast option ~ check out this Tropical Overnight Oats recipe.

Here are the links & coupon codes for the ingredients for this delicious dessert

+ Nuzest Plant-Based Protein ~ save 15% with code MOMKNOWSBEST15 https://nuzest.com/

+ Viva Naturals Chia Seeds ~ save 10% with code ORGANIC https://vivanaturals.com/

+ Lekkco Salted Caramel Chocolate Spread ~ save 15% with code MOMKNOWSBEST https://www.lekkco.com/

Pin this recipe on Pinterest for later

Gluten-Free Pad Thai Make At Home Recipe

 Pad Thai is a favorite meal for many when eating out, but it is not made for those who avoid wheat. This gluten-free recipe for Pad Thai is so delicious and easy to make at home. Keep reading to get the recipe for Gluten-Free Pad Thai.


  On New Year's Day, my husband wanted to go out to eat, and he was happy that I said yes! I was hungry for something in the line of Oriental food, but my favorite place was closed for the holiday. So we decided to check out a new place. We discovered a small Thai restaurant near us, and I was glad that I did. I had never dined at a Thai place before, so the menu was new to me. So many entrees that I wanted to try.

 I decided to try Pad Thai as the menu description sounded amazing: small rice noodles with egg, tofu, sweet radish, onion, and bean sprouts wrapped in a Thai egg crepe. I admit it was the Thai egg crepe that sounded so delicious and persuaded my meal choice for the night. I had never tried Pad Thai, so I was curious to know what kind of sauce would be on the rice noodles and veggies. 

 I asked the server if the dish had any dairy in it and was relieved that it did not. Eating out can be hard when you have a dairy allergy. Oriental food is always a preferred spot when I choose to eat out, as it usually does not contain any milk products, so I don't have to worry about an asthma attack from my dairy allergy. I was able to order the Pad Thai without tofu as I am sensitive to soy, too.


 When my order of Pad Thai arrived at my table, I was excited to try it as it looked so delicious. The restaurant had placed an egg crepe over the veggies and rice noodles, so it looked like a Thai pot pie. I used my fork to slice through the egg crepe and revealed a beautiful mixture of veggies with a nice orange sauce. The orange sauce reminded me of Malaysian palm oil, so my taste buds were excited to try Pad Thai for the first time. 

 The first bite was so delicious and sweet. My dish had plenty of veggies in it. The veggies were all cut into thin strips, so it was hard to distinguish the noodles from the onions and cabbage. It was a delicious work of art! My husband asked for a bite, and I reluctantly let him try the Pad Thai as it was too good to share. I loved that Pad Thai was a dairy-free meal that I could enjoy.

 When we got home from our restaurant dinner, I knew that I had to learn how to make Pad Thai. So I turned to the internet in search of a Pad Thai recipe. I was amazed to learn that the Pad Thai sauce was made from Tamarind paste. This was an ingredient that I had never heard of, nor had I seen it in grocery stores. So I needed to find a substitute for Tamarind paste. I learned that you could substitute ketchup for the Tamarind paste.

Pad Thai is
~ Delicious
~ Easy-To-Make
~ Vegetarian
~ Dairy-Free
~ Healthy
~ Can be made Keto
~ Make it Gluten-Free with Tamari Soy Sauce
~ Homemade
~ Full of Fiber
~ Loaded with Veggies


Omit the rice noodles to make it Keto-friendly
 Once I looked at a couple of Pad Thai recipes online, I knew that this Thai recipe could easily be made into a keto-friendly recipe. Many of my friends follow the keto diet plan, so I wanted to give them options when making this recipe. The keto meal plan is something that I don't follow, as I have too many other diet restrictions with my food allergies.

Ingredients Needed
~ Bean Sprouts
~ Carrots
~ Cabbage
~ Zucchini
` Garlic
~ Onion
~ Eggs
~ Peanuts
~ Palm Oil
~ Pad Thai Sauce ~ homemade recipe below


This post may contain Amazon affiliate links

A traditional Thai meal made vegetarian

 Traditional Pad Thai is made with chicken, but since I don't eat meat, I made my dairy-free recipe without meat, so it is a meal that vegetarians can enjoy if you omit the anchovies. If you follow a vegan diet, just omit the eggs and the anchovies. The best part of Pad Thai, in my opinion, is all the delicious plant-based vegetables. 


 I also love that this Thai dish is dairy-free. You can use so many different veggies in this dish, just think about the different vegetables that are in Chinese food dishes. I choose to use cabbage, carrots, zucchini, and bean sprouts in my recipe but you could add sweet radish, broccoli, and mushrooms if you like. You could also omit any veggies that you don't like. My husband would prefer that I did not add zucchini. I like cooking my vegetables in this palm oil as it gives the vegetables an awesome flavor. Carrots are a keto vegetable that should be used sparingly, as they do have carbs in them so you can also omit the carrots and add zucchini or even bean sprouts.  

Pad Thai sauce is so easy to make


 Pad Thai gets its delicious taste from a sweet sauce, and this sauce is so easy to make. If you are short on time, you could buy Pad Thai sauce in a jar, but when you make it at home, you can make it keto-friendly. 

 Traditional Pad Thai sauce has tamarind paste in it and fish sauce in it but those items may be hard to find in a traditional grocery store, so I discovered that you can use ketchup, soy sauce, brown sugar, and anchovies to get the same flavor, as fish sauce is made from anchovies. Just make sure to use sugar-free ketchup and a keto-friendly sugar. My husband was surprised at how close my recipe tasted to the restaurant version of Pad Thai. If you like a lot of sauce with your veggies, just double the recipe. You can store the extra Pad Thai sauce in the fridge for another batch of Pad Thai.

The eggs are so delicious in Pad Thai

 Pad Thai has scrambled eggs in it, and that adds some protein to this dish. Adding the eggs to the cooked veggies is so easy. After you cook all the vegetables, just push the veggies to the side and add the whisked eggs to the empty part of the pan. Scramble the eggs and then stir them into the cooked veggies. Traditional Pad Thai only has 2 eggs in it, but I added three to my recipe. You could add more if you like more eggs in your dish.


Add rice noodles for a non-keto version
 Traditional Pad Thai also contains rice noodles, so omitting the noodles makes this a keto meal. The rice noodles will also soak up some of the delicious Pad Thai sauce, so the keto Pad Thai will have more sauce to it but trust me, extra sauce is so good. I decided to make some rice noodles so I could try this recipe with them. So to make this meal keto-based, just serve the rice noodles on the side. So non-keto friends can add them to their dish. I tried the Pad Thai both ways, and I thought it tasted great with or without the rice noodles. If you decide to add rice noodles, cook them according to the directions on the package. I like to add a tablespoon of palm oil to the cooked noodles to keep them from sticking. 


 Palm Oil is a healthy ingredient in Keto recipes


When you use Malaysia Palm Oil in recipes, you get some amazing flavor and some added health benefits. Palm oil is also a great source of vitamin E, tocotrienols, and beta-carotene. Malaysian red palm fruit oil has more carotene than tomatoes or carrots. This oil is also stable at high temperatures. This naturally trans-fat-free oil is a great addition to any chef’s kitchen. You can purchase red palm oil on Amazon.


Keto-Friendly Pad Thai With Malaysian Palm Oil


Keto Friendly Pad Thai With Malaysia Palm Oil
Yield: 4
Author:
This restaurant-quality Pad Thai recipe is surprisingly easy to make at home and can be made keto-friendly.

ingredients:

PAD THAI INGREDIENTS
  • 1 batch Pad Thai Sauce (see below)
  • 2 tablespoons Malaysian sustainable palm oil
  • 1 cup bean sprouts
  • 1 cup shredded carrots
  • 1 cup shredded cabbage
  • 1 zucchini, thinly sliced
  • 4 cloves garlic, minced
  • 1 small onion, thinly sliced
  • 3 eggs, whisked
  • 1/4 cup chopped peanuts
SAUCE INGREDIENTS
  • 1/3 cup keto-friendly brown sugar
  • 1/4 cup sugar-free ketchup
  • 1/4 cup soy sauce
  • 1 small can anchovies, diced up
  • juice of 1 fresh lime
  • 1/4 teaspoon crushed red pepper flakes

instructions:

How to cook Keto Friendly Pad Thai With Malaysia Palm Oil

  1. Make the sauce - Whisk all ingredients together in a medium bowl until completely combined. Set aside.
  2. Cook the veggies - Add 2 tablespoons palm oil to a heated sauté pan. Add all the veggies and garlic to the palm oil. Saute the veggies for about 5 minutes or until soft, stirring occasionally, 
  3. Cook the eggs - Push the cooked veggies to one side of the pan and add the eggs on the other side.  Then cook the eggs until scrambled.  
  4. Add the Pad Thai sauce and stir up everything together in the pan until well combined.
  5. Remove the Pad Thai from the heat and sprinkle the crushed peanuts on top of it.
Created using The Recipes Generator

BBQ Pineapple Tuna Pizza That Is Dairy & Gluten Free

This pizza is wildly delicious!

I received samples from Wild Planet to facilitate this post

  Most days I crave pizza and all it takes is for me to see a recipe for pizza to want one for a meal. The other day I was online and I saw this recipe for BBQ chicken pizza and it looked so delicious. So I knew that I had to make one for lunch. Now if you know me by now, I don't eat chicken and I have a dairy allergy. So that means I have to do pizza differently. I have only been dairy-free for 6 months but eliminating dairy from my diet has made a big difference in my health. My asthma is under control and I have been able to discontinue my allergy medicines. I am also sleeping better as I have not had any sleep apnea issues either. So as hard as it is, I have to avoid all dairy. I would do anything for a slice of gooey cheese pizza but for now, I use dairy-free cheese on my pizza. Since I don't eat chicken, I decided to try Wild SkipJack tuna on my pizza. This sustainably pole and line caught 100% pure tuna has a great texture and I knew that the barbecue sauce would give it great flavor.

230mg EPA & DHA Omega 3 per serving


     I also keep my freezer stocked with these amazing gluten-free pizza crusts so I can make a dairy-free pizza anytime I crave a pizza. I don't have to eat gluten-free but I prefer Caulipower crusts as they have an amazing taste and they are so easy to top with my favorite toppings. 

Wild Planet makes more than tuna


 I always have a pantry stocked with Wild Planet products as they are so delicious and loaded with healthy omegas! I like that their seafood products are sustainable and so fresh. If you are a sardine fan, you have to try their Wild Sardines. The Wild Sardines are packed in extra virgin olive oil for great flavor and I am known to eat the whole can by myself. My husband loves Wild Planet's Organic Roasted Chicken Breast for his work lunches. It may be chicken in a can but he says it has great taste and he likes that he doesn't have to cook it.


  I was amazed at the taste of my BBQ Pineapple Tuna Pizza as the flavors blended so well. The barbecue sauce made the tuna taste great and the pizza did not a fishy taste like I expected. So wild tuna makes a great substitute for chicken and I loved that I was getting 230mg EPA & DHA Omega 3 per serving. You have got to make this pizza to understand how delicious it is.


If you’ve tried Wild Planet, you know what I mean.


Yield: 2-4

Dairy-Free & Gluten-Free BBQ Pineapple Tuna Pizza

Prep time: 5 mins Cook time: 20 mins total time: 25 mins

ingredients

Oven 450F

instructions

  1. Place the gluten-free pizza crust on a baking stone or sheet.  Spread the barbecue sauce over the crust and then top with the pineapple slices. Break the wild tuna into pieces and place evenly on the pizza crust.  Sprinkle on the dairy-free cheese. Bake for 20 minutes or until the cheese is slightly melted. 
  2. Note: Dairy-free cheese has a tendency to not melt so I would take the pizza out once your crust starts to brown.
Created using The Recipes Generator
data-matched-content-rows-num="2" data-matched-content-columns-num="2"
Mom knows best